Annotations
Introduction to Annotations
One of the common uses for eleFront is its capability to assist in the automated generation of drawings. In traditional drafting, the linework is typically annotated by indicators such as dimensions, leaders, text, hatches et cetera. eleFront provides a set of components that create the annotations in a Grasshopper-compatible way.
 Annotation Components
When annotations are created using one of the many eleFront components, an eleFront-specific annotation object will be created.

Linear Dimension Component
These annotation objects can be treated as any other native Grasshopper object and baked with attributes using either the eleFront Bake component or the conventional Grasshopper way of baking.
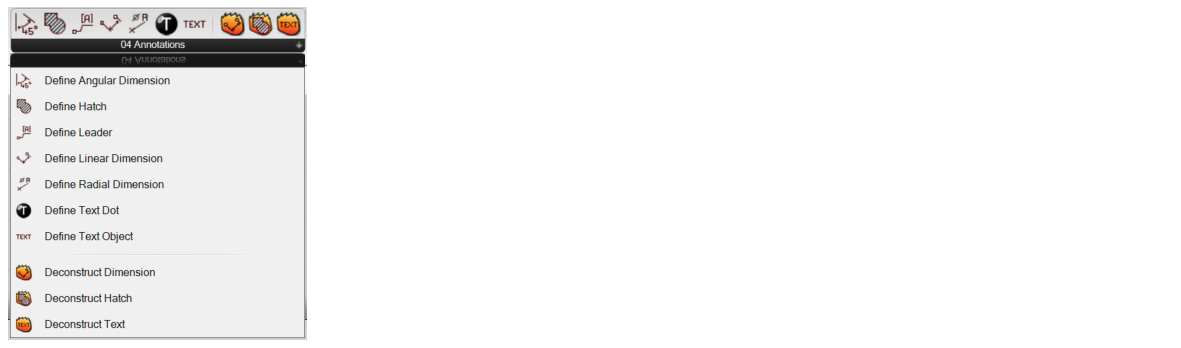
Annotation components include:
Define Angular DimensionDefine HatchDefine LeaderDefine Linear DimensionDefine Radial DimensionDefine Text DotDefine Text ObjectDeconstruct DimensionDeconstruct HatchDeconstruct Text
Defining Annotations
Creating annotations with eleFront is straightforward, but there are a few details regarding both the specific components and the way that Rhino handles annotations that users should become familiar with to take full advantage of these components. By studying the inputs and the corresponding annotations in the diagrams below, we can see the way in which each works and the commonailties between them.
Dimensions, Leaders and Text Objects
Generally, the inputs will be formed from several of the following:
- Input Points to measure the actual dimension. Note the order in which they are entered
- Location of the text label or an offset of the label from the reference points
- Plane, will set the projected direction of the dimension for the
Define Linear DimensionandDefine Radial Dimensioncomponents, for others it will set the plane of the annotation text, see Planes for more information - Dimension Style, plugging in a
Value Listcomponent will populate all the dimension styles in the document, from which we may choose a preferred style. Of course, this can be multiple values as well. See Dimension Styles for more information - Overwrite Text, as well as a single entry,
Concatenatecan be used to augment values by for example adding notation or units
Examples
See below for examples of how to use the various annotation components

Define Text Object

Define Leader
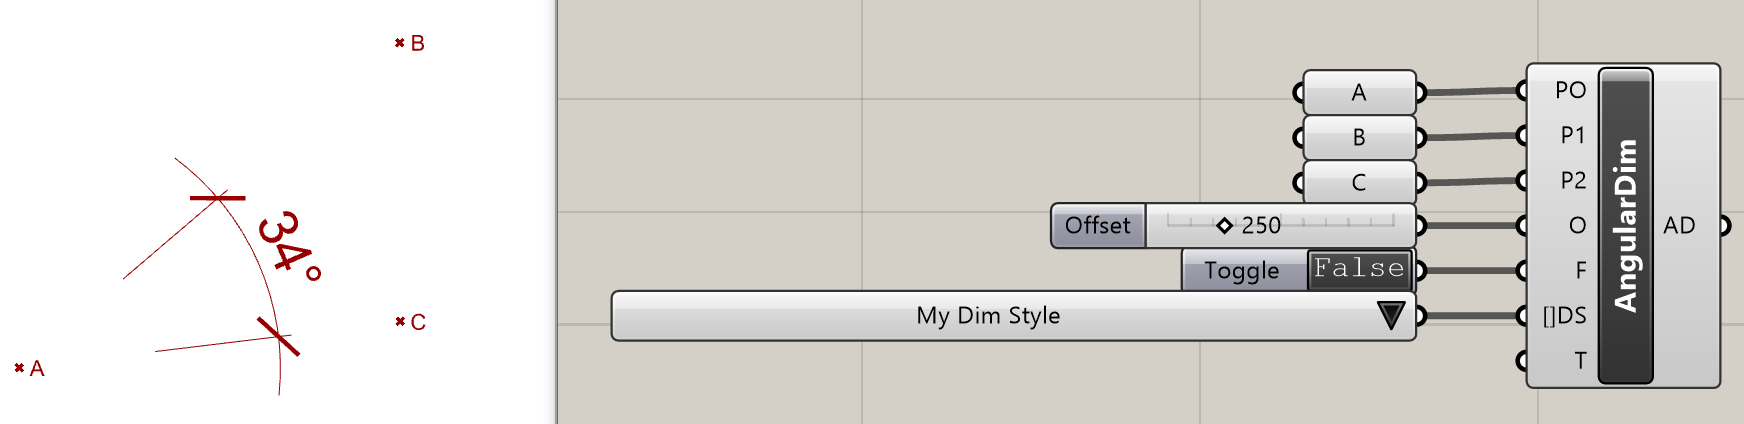
Define Angular Dimension
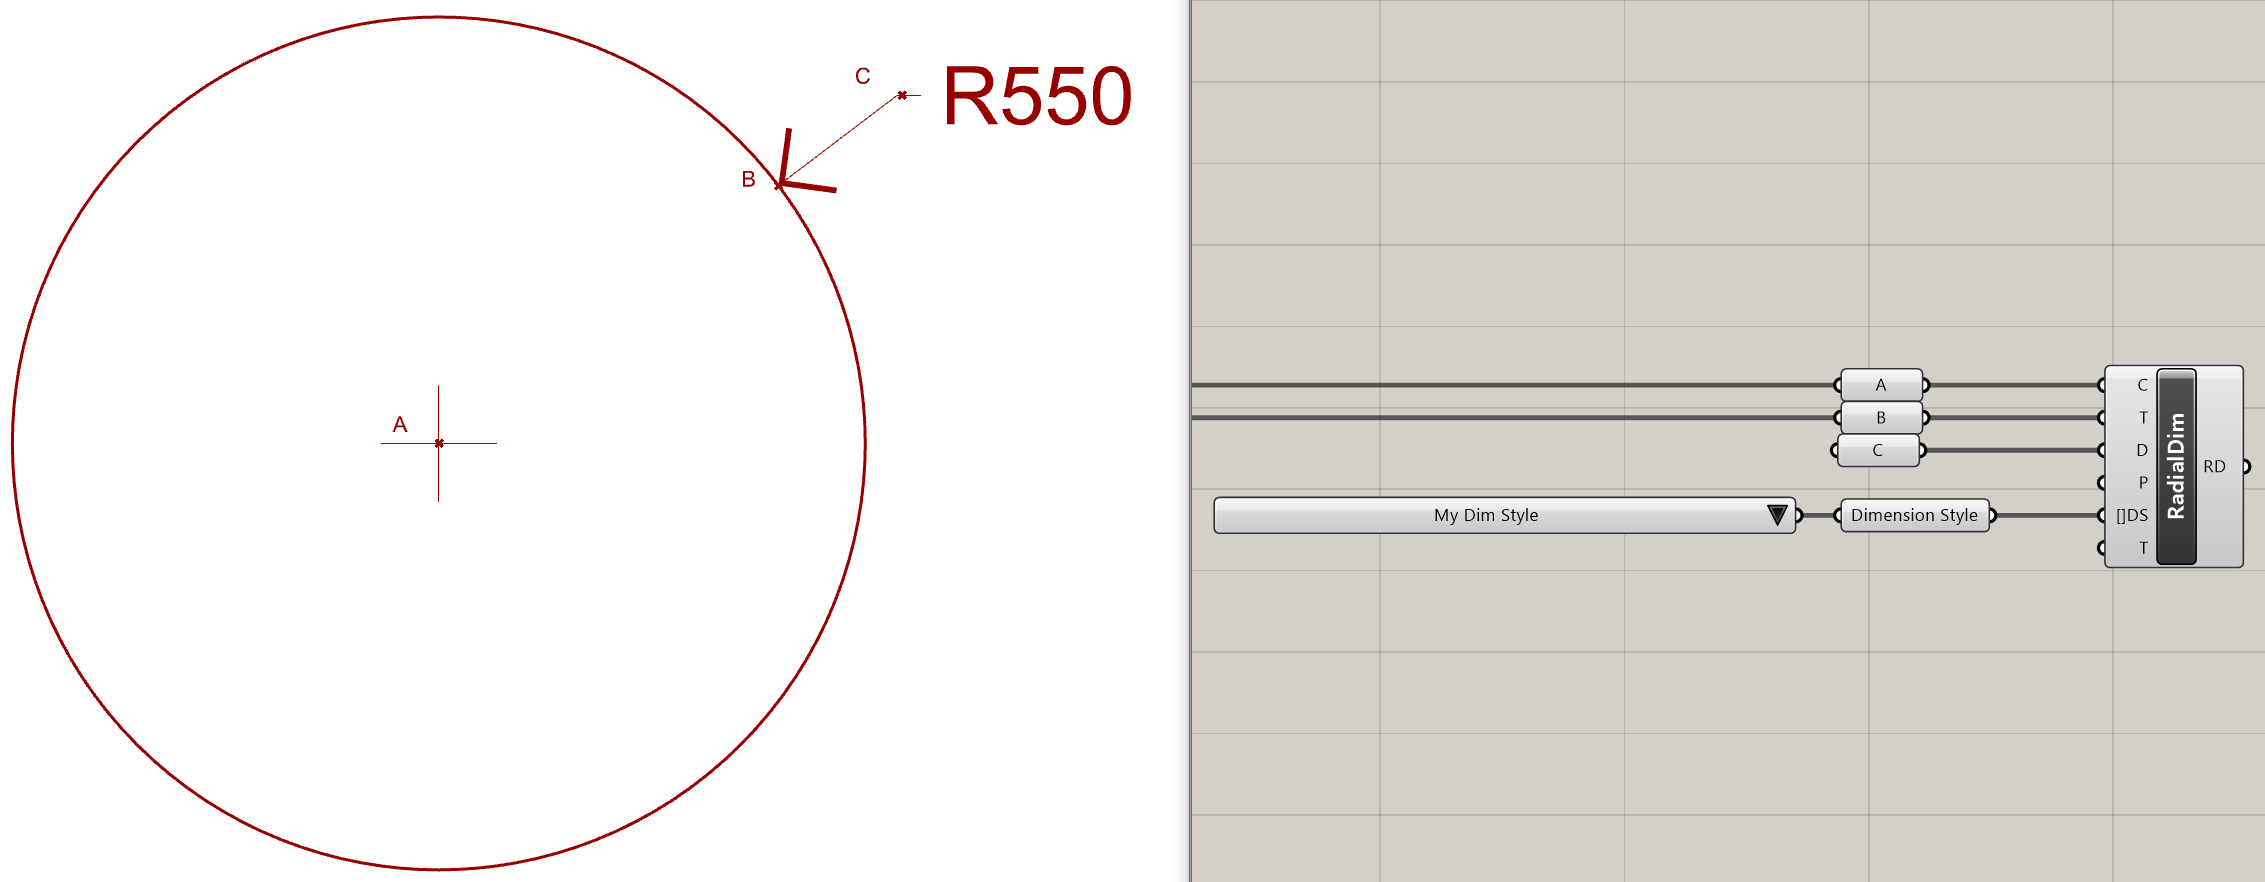
Define Radial Dim

Define Linear Dim - No plane defined
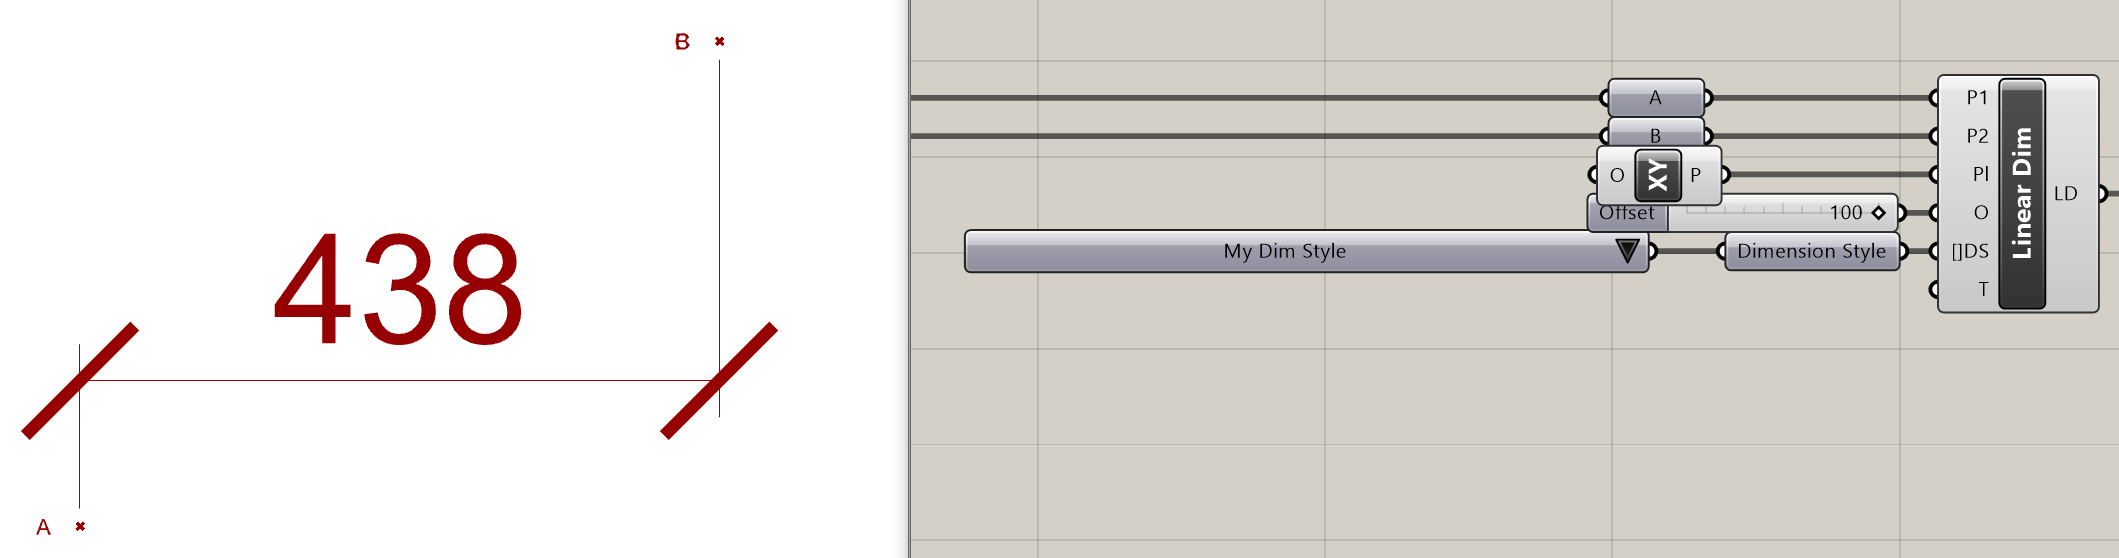 _
_Define Linear Dim - Plane defined
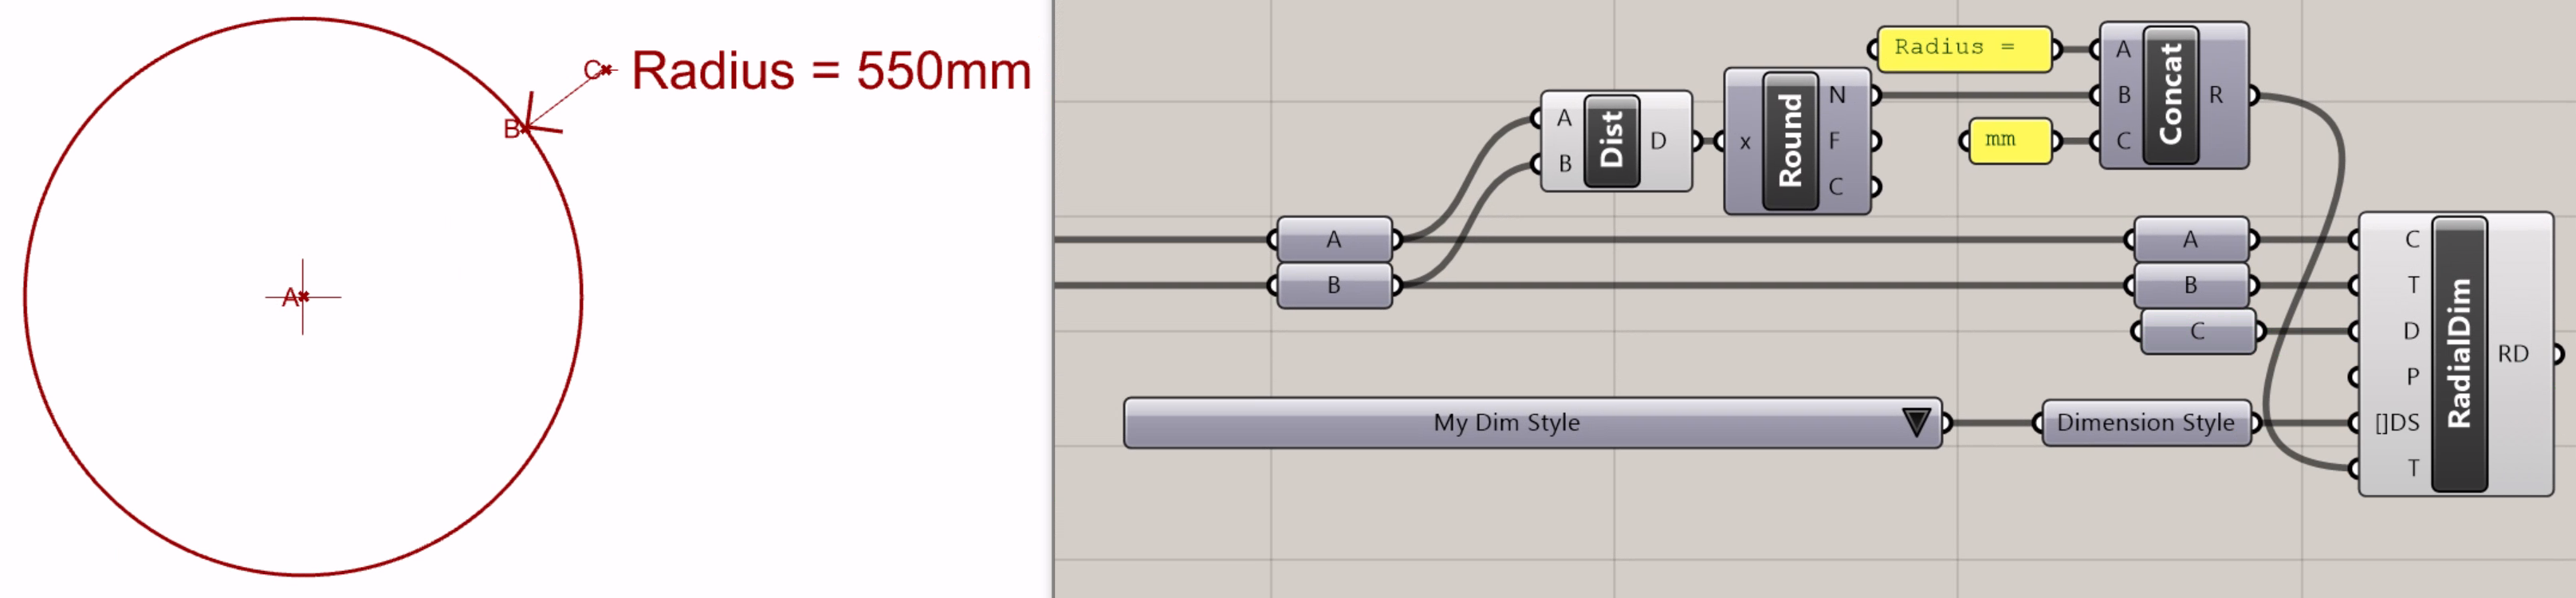
Define Radial Dim with text override
Planes
As touched upon in the overview, particular attention should be paid to the “Planes” input when creating dimensions. While for Define Text Object and Define Leader, the plane simply describes where the label is placed, using planes in Define Linear Dim and Define Radial Dim will fundamentally change the way in which the points are measured.
The role of planes in Define Linear Dim is described in the examples section and manifests quite clearly in Rhino, showing how the dimension has been projected, however in Define Radial Dim, care should be taken regarding the projection plane since it is harder to spot if the plane is not as intended.
The example below shows the same circle (black) measured with several different planes, first the XY (magenta) which is also the default plane, then the YZ (blue). Since the original circle is tilted out of plane, we can see the way in which the component tries to calculate the radial dimension using the different planes. The “true” radial dimension is calculated when we input the plane of the curve, while the magenta and blue represent the horizontal and vertical components, respectively, as the curve is projected to those planes and the distance between the two points is measured.
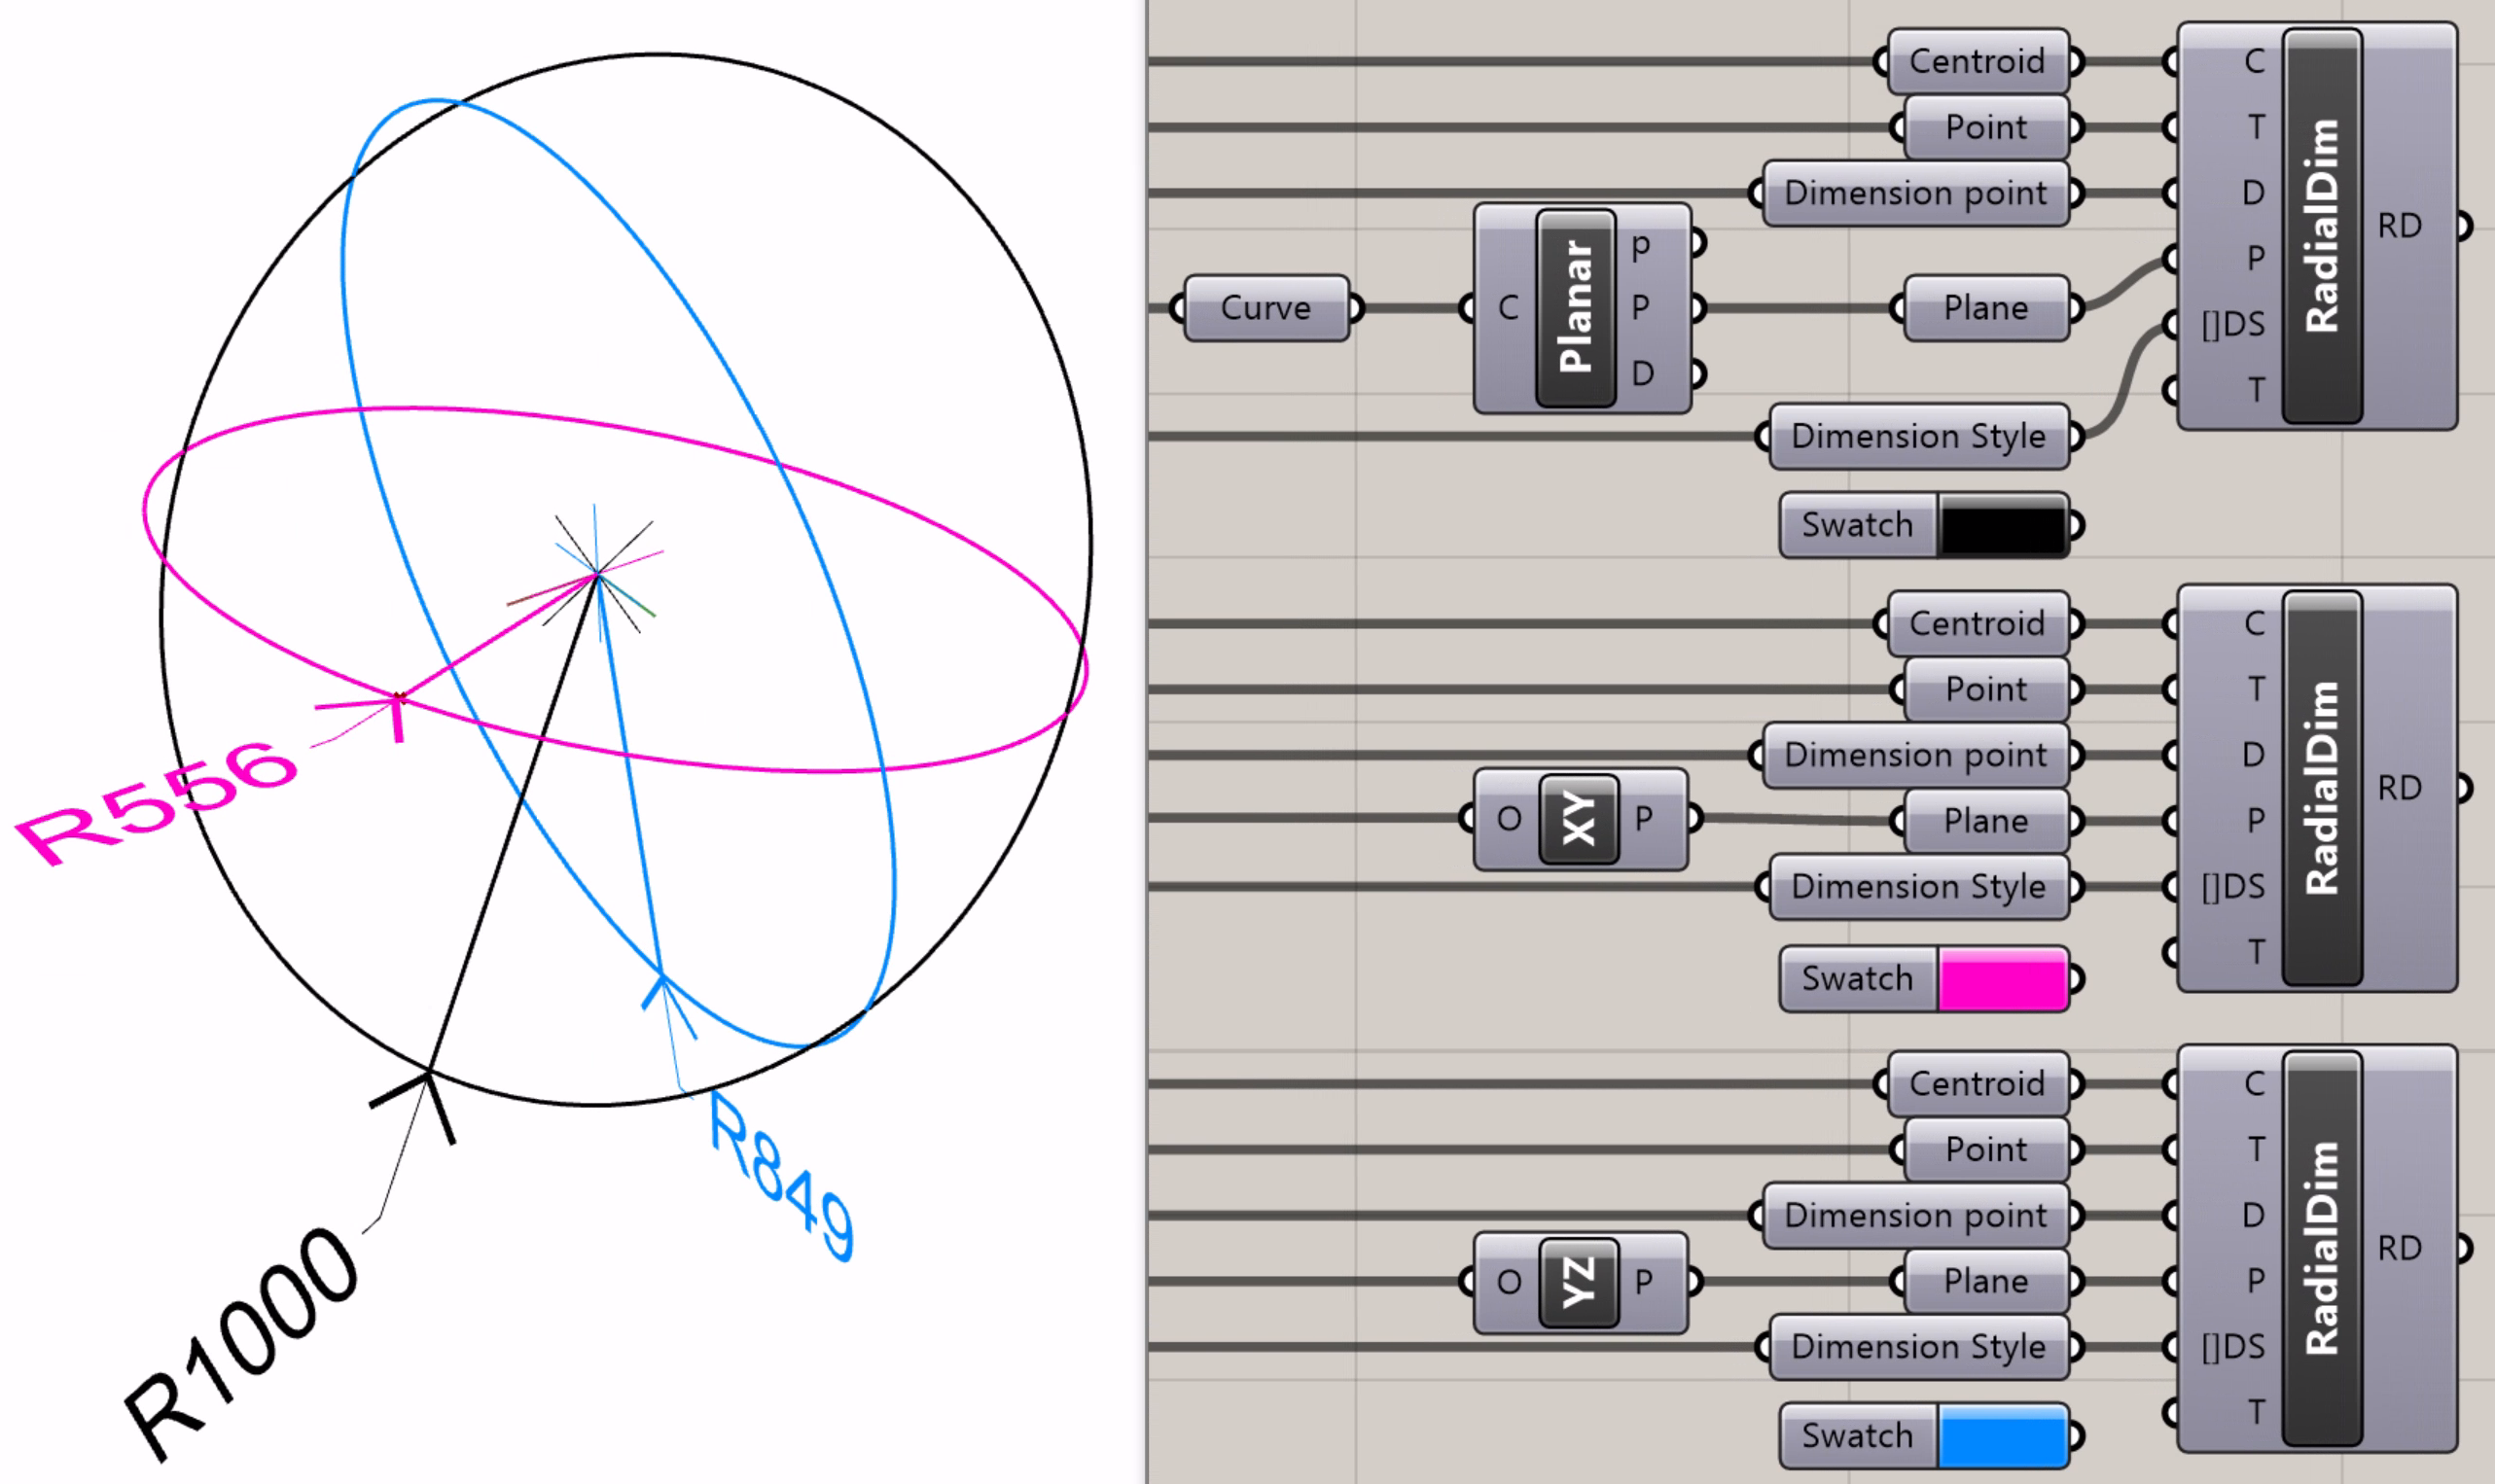
Define Radial Dim with different planes applied
Note that this is distinct from measuring the radius of these curves, which is available by dividing the circumference (Length) by 2π or, if the curve is non-circular, by using the Curvature component native to Grasshopper and performing the same operation.
Hatches
Using the Define Hatches component is very similar to defining other annotation types, however instead of the dimension styles input, “Hatch Pattern” is used, which is also accessed and edited through the Rhino User Interface.

Define Hatch
Deconstructing Annotations
As mentioned previously, annotation objects can be treated just like any other object in Grasshopper, including extracting User Attributes (if present) and Rhino properties. With eleFront, we can also extract their annotation-specific properties. See the examples below
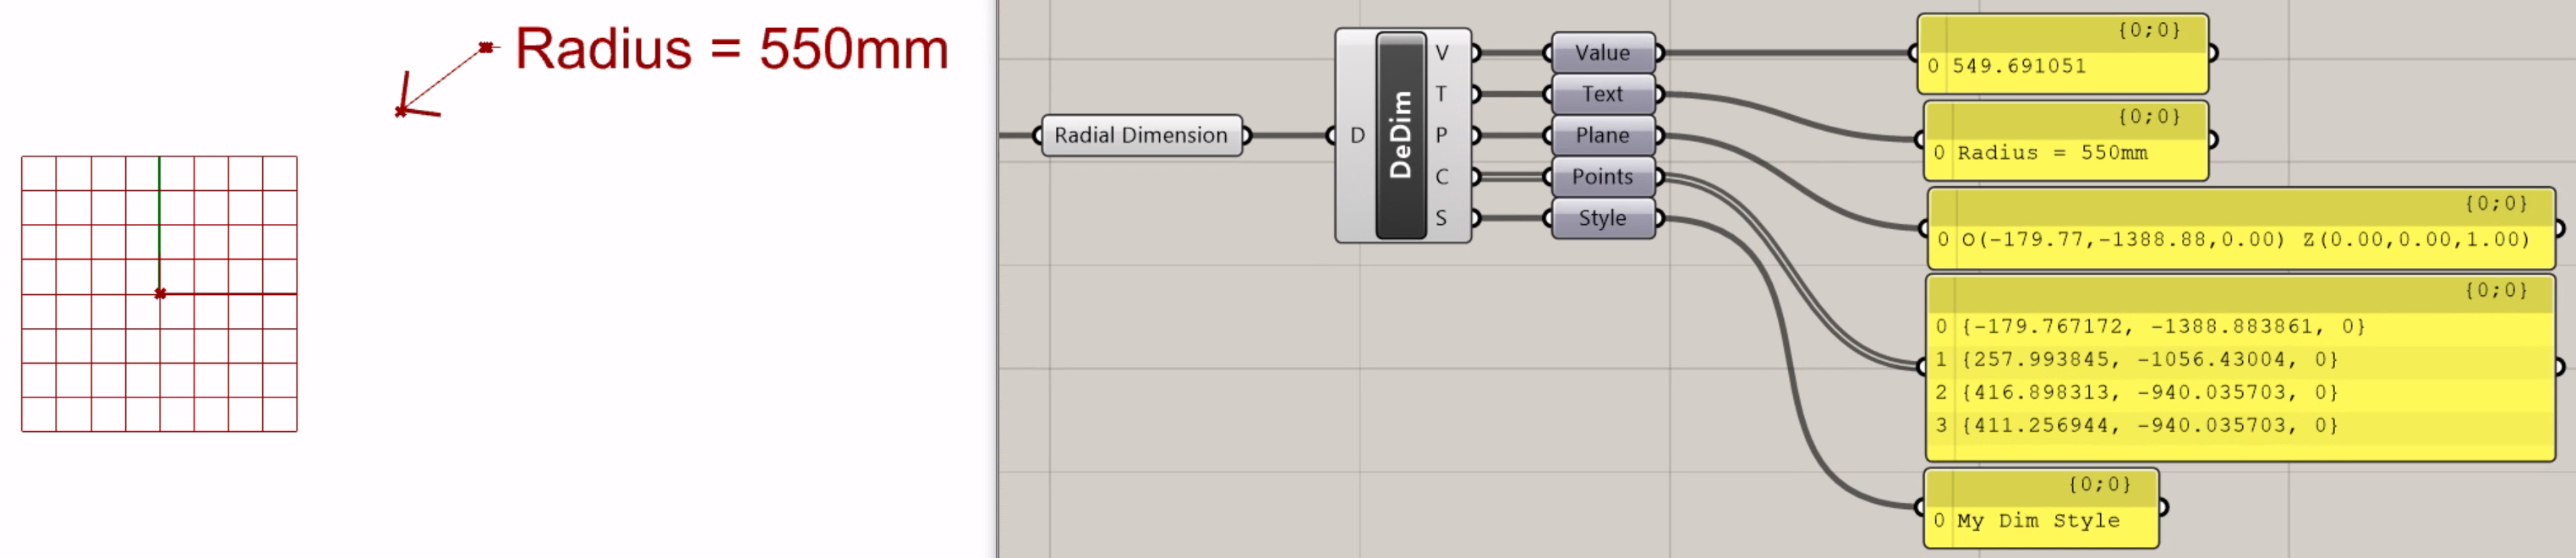
Deconstruct Dimension used with a radial dimension

Deconstruct Text
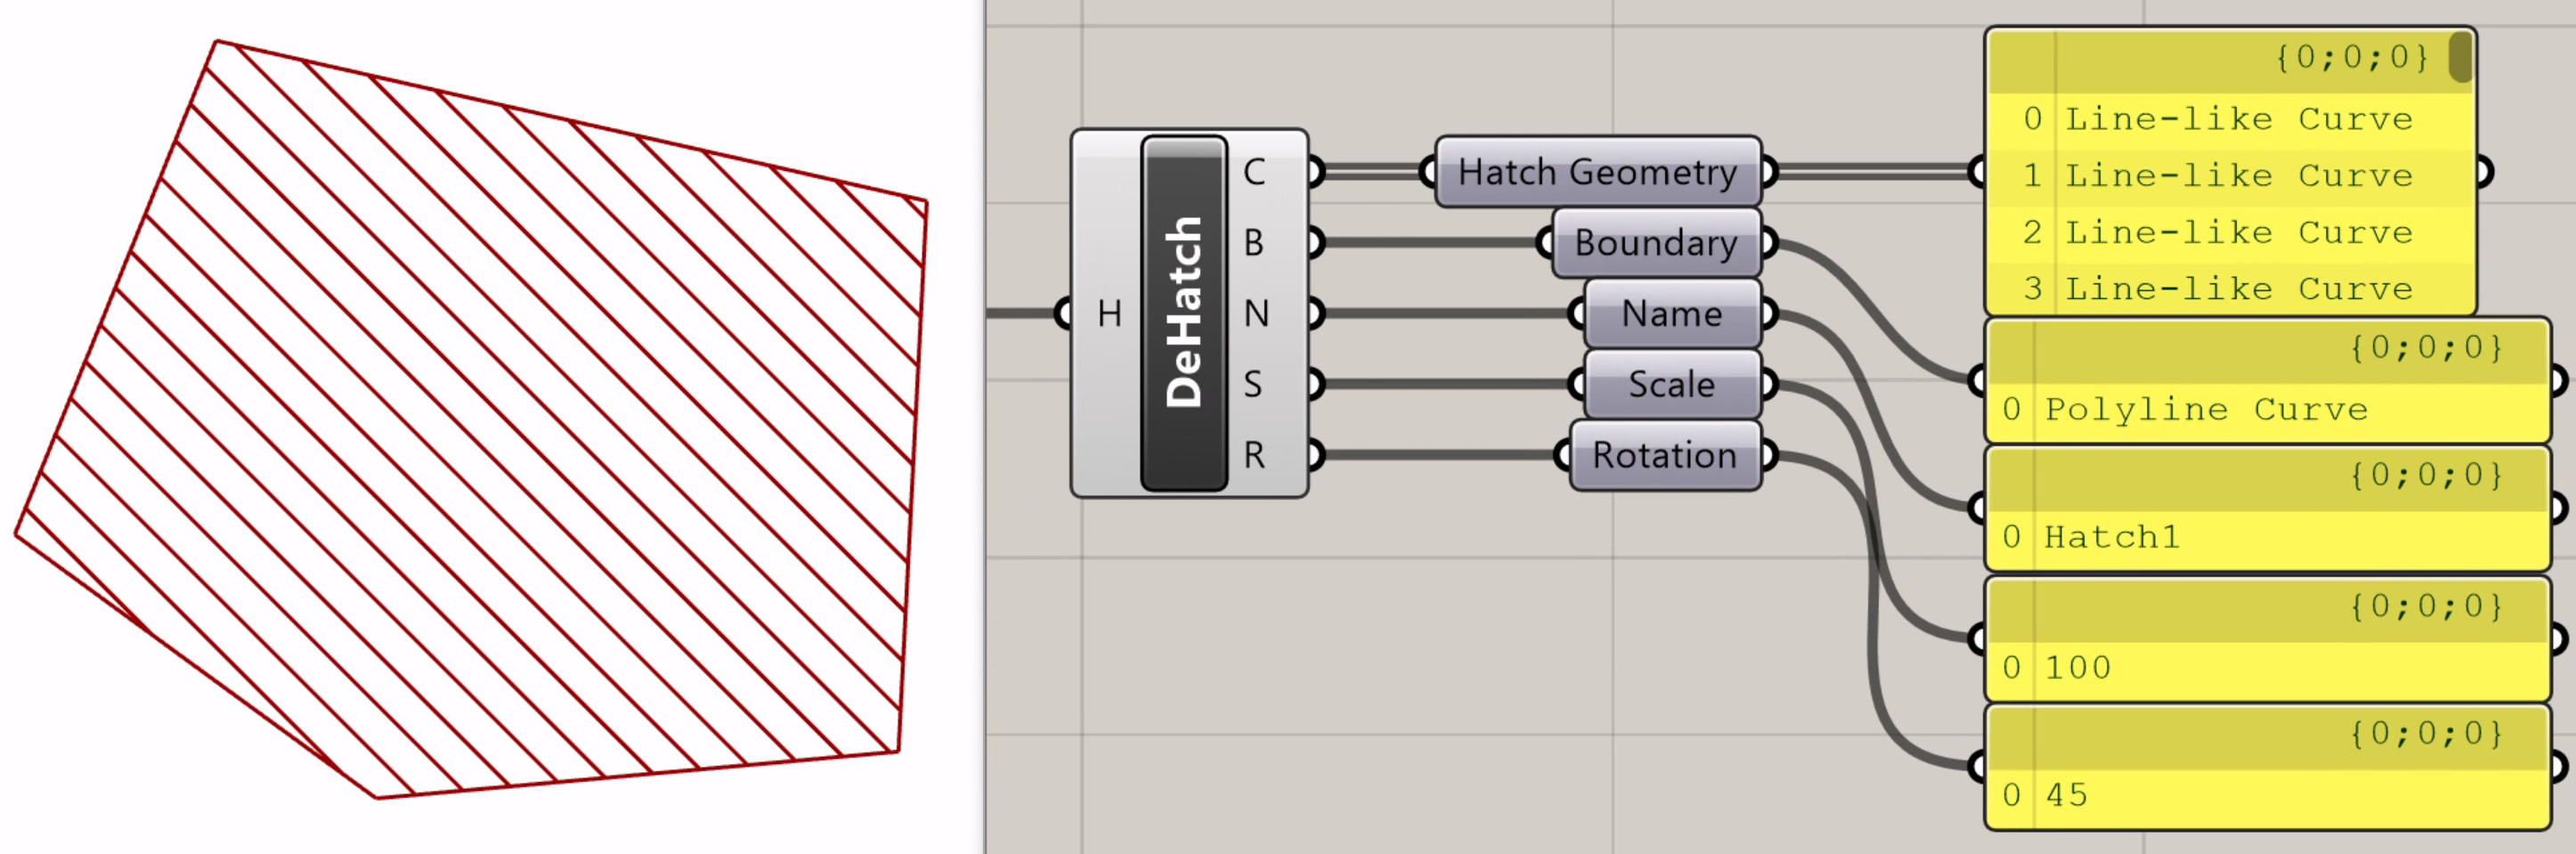
Deconstruct Hatch
Dimension Styles
At the time of writing, while eleFront can read and use dimension styles in the current Rhino document, it does not have the ability to add or edit them. Fortunately, the Rhino User Interface makes it simple to create and update dimension styles to then use in eleFront.
To do this, we can use the “Document Properties” in Rhino, then by selecting “Annotation Styles”. From there there are several choices, including creating, matching, importing, editing or deleting a style. Updating an existing style here will update all instances of that annotation object of that style, unless they have overrides active. More information is available in the McNeel online documentation.
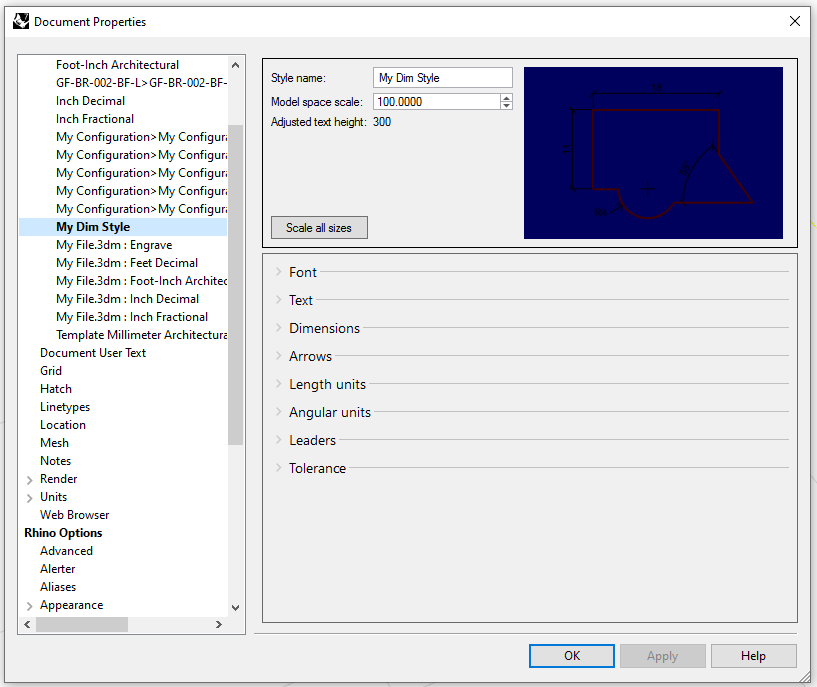 Options to edit dimension styles in the current document
It is also possible to edit individual annotation objects by selecting the annotation, navigating to the the properties tab updating however the user sees fit. It is worth noting that rebaking will overwrite all of these individual changes, so it is best to set up the dimension styles first and assign as needed.
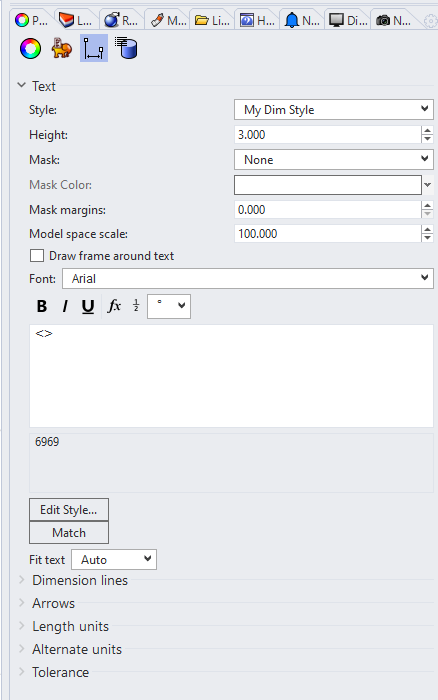 Dimension style tab